Propagation equipment earns its cost in two ways: it raises the share of seeds and cuttings that become sellable plants, and it cuts the hours spent on repetitive handling.
Most other purchases in a small nursery, such as a bigger bench or a nicer label printer, do neither until volume is high.
This article sorts nursery equipment for plant propagation by the stage of the plant’s life it serves, then marks each item as buy now, rent or build, or wait.
It also gives a rough idea of how long each item lasts, because the total cost of a tray, a heat mat or a length of shade cloth includes replacing it.
Start With the Plants You Propagate, Not the Catalogue
Vegetable transplants, flowers and fruit trees put different demands on a propagation area, so the first decision is which methods you will use most.
- Vegetable transplants are almost all seed-started. The volume is high, the time in the propagation area is short, and the main needs are consistent warmth, clean trays and enough bench space to hold flats until planting.
- Flowers are a mix: many annuals and perennials come from seed, while others are propagated from cuttings or divisions. You will use both seed-starting and rooting equipment.
- Fruit trees and bushes are mostly grafted, budded or rooted from cuttings, and the plants stay with you for months or seasons. Holding space, drainage and bigger containers matter more than germination gear.
Write down your three or four best-selling or most-wanted plants and the method that produces each.
Then work through three stages: seed and cuttings, rooting and hardening, potting and holding.
Buy first for the stage where your plants are most often lost or where labour is heaviest, and leave the rest until that stage is working.
Seed Starting and Germination: Trays, Media and Heat Mats
Germination equipment is cheap compared with what it protects.
A flat of seedlings that fails to emerge wastes the seed, the media and the weeks of bench space it occupied.
Buy first:
- Cell trays and flats. Cell trays give each seedling its own root space and make transplanting faster, since you lift a plug instead of untangling roots. Choose a cell size to suit the crop: small cells for lettuce and brassicas, larger ones for tomatoes, squash and big-seeded flowers. Rigid, reusable trays are cheaper per use than thin disposable ones if you will wash and reuse them.
- Seed-starting mix. Use a fine, sterile, free-draining mix made for seed. Garden soil and heavy potting mix hold too much water and often carry disease organisms. Buy it in bulk once you are using it every week.
- Heat mats with a thermostat. Many seeds germinate faster and more evenly with bottom warmth, and the packet or supplier’s growing notes give the temperature range for each crop. A mat without a thermostat can overheat the media, so treat the controller as part of the purchase.
- Humidity domes or clear covers. They keep the surface of the media damp until seeds emerge. Remove them as soon as seedlings are up, since stagnant humid air invites damping off.
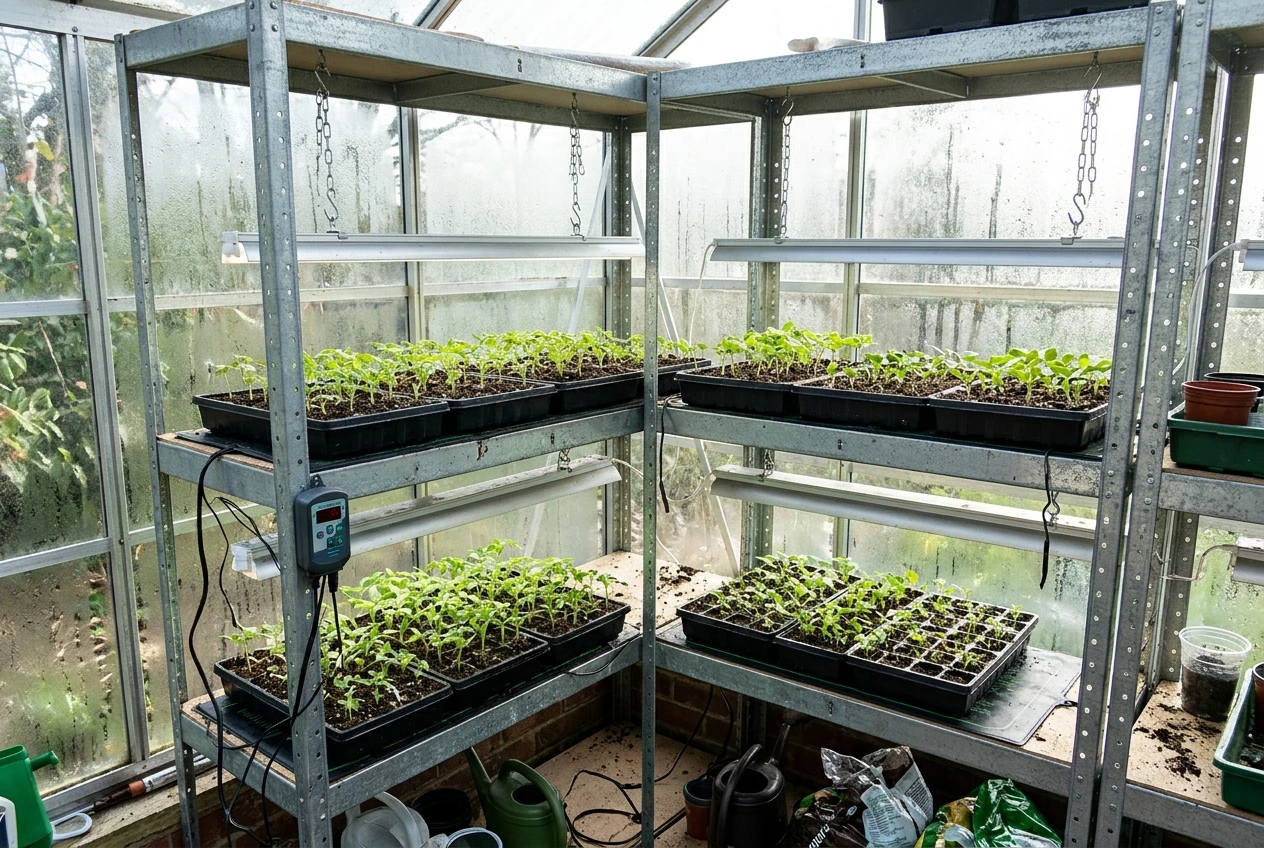
Build or improvise: A germination shelf made from ordinary shelving, with the heat mats on the lower shelves and lights above, costs far less than purpose-built propagation racks.
Fit lights on chains or adjustable hangers so they can be raised as seedlings grow.
Wait: Mechanical seeders and dedicated germination chambers pay off when you are sowing thousands of cells a week.
Hand sowing with a simple dibber or a folded paper trough is adequate below that.
How long they last: Good rigid trays survive several seasons if they are not stacked while wet, dropped or left in strong sun all summer; replace them when they crack, warp or can no longer be cleaned properly.
Heat mats generally fail at the thermostat, the cable or the plug, so test them before each season rather than discovering a dead mat after sowing.
LED grow lights dim gradually, so replace them when seedlings stretch toward the light more than they used to.
Good seed matters as much as good trays.
If a seed lot is failing, check the source before blaming the equipment, and see how to source vegetable seed for a small farm for how to spread that risk.
Rooting Cuttings: Misting, Humidity Chambers and Bottom Heat
A cutting has no roots to replace the water it loses through its leaves.
Rooting equipment exists to keep leaves from drying out while the base forms roots.
Buy first:
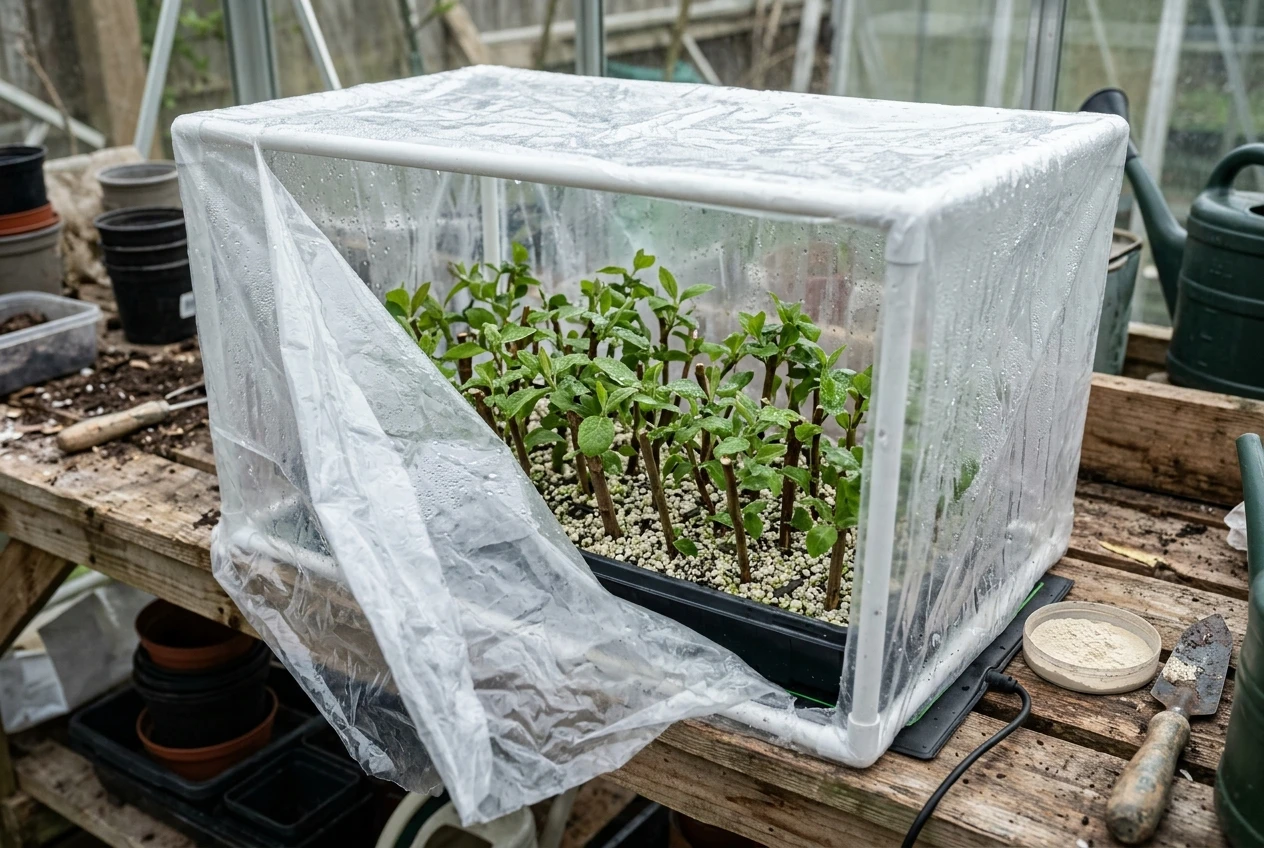
- A humidity chamber. This can be a clear plastic tent, a covered frame on a bench, or a lidded propagation tray. Seal it well enough to hold humidity but open it daily for a short time to let air in and check for rot. It is the lowest-cost way to root softwood and semi-ripe cuttings of many flowers and shrubs.
- Bottom heat. A heat mat under the rooting tray warms the base of the cuttings without heating the air around the leaves. It is the same mat and thermostat used for seed, so one purchase can serve two stages if the timing does not overlap.
- Sharp, clean cutting tools. A sharp knife or snips make clean cuts that heal quickly. Keep a set for propagation only so the blades stay sharp and clean (see the cleaning section below).
- Rooting hormone and a rooting medium. Both are consumables. Use a medium that drains well and holds some air, such as perlite or coarse sand mixed with a fine peat or coir blend, and decant the hormone into a small dish rather than dipping into the stock container, which would contaminate it.
Build or improvise: A humidity chamber made from a wooden or pipe frame covered with clear polythene costs little and can be sized to the bench.
Disassemble and wash it between batches.
Wait: A timer- or leaf-sensor-controlled mist system makes sense when you root a large number of cuttings at once and cannot check them several times a day.
Until then, a chamber and a hand mister cover most needs.
Many hardwood cuttings, such as those taken from some fruit bushes in winter, are rooted in damp media in cool conditions with no mist at all, so check the method for each species before buying mist equipment.
How long they last: Mist nozzles clog with minerals from hard water, so install a filter and check the nozzles at the start of each season.
Clear polythene covers go cloudy and brittle with sun exposure and are cheap to replace every season or two.
Solenoid valves and timers can run for many seasons, but spares of the small parts such as diaphragms are worth keeping.
Hardening Off and Holding Benches: Shade, Airflow and Drainage
Plants raised in a warm, humid, sheltered space need gradual exposure to wind, sun and cooler temperatures before they go out.
The holding area is also where unsold stock sits, so it needs to keep plants healthy for weeks, not days.
Buy first:
- Benches or a clean raised surface. Raising containers off the ground keeps them away from soil-borne disease, lets water drain away and puts the work at a height that is easier on the back. Wire mesh or slatted tops allow air to dry the pot bases.
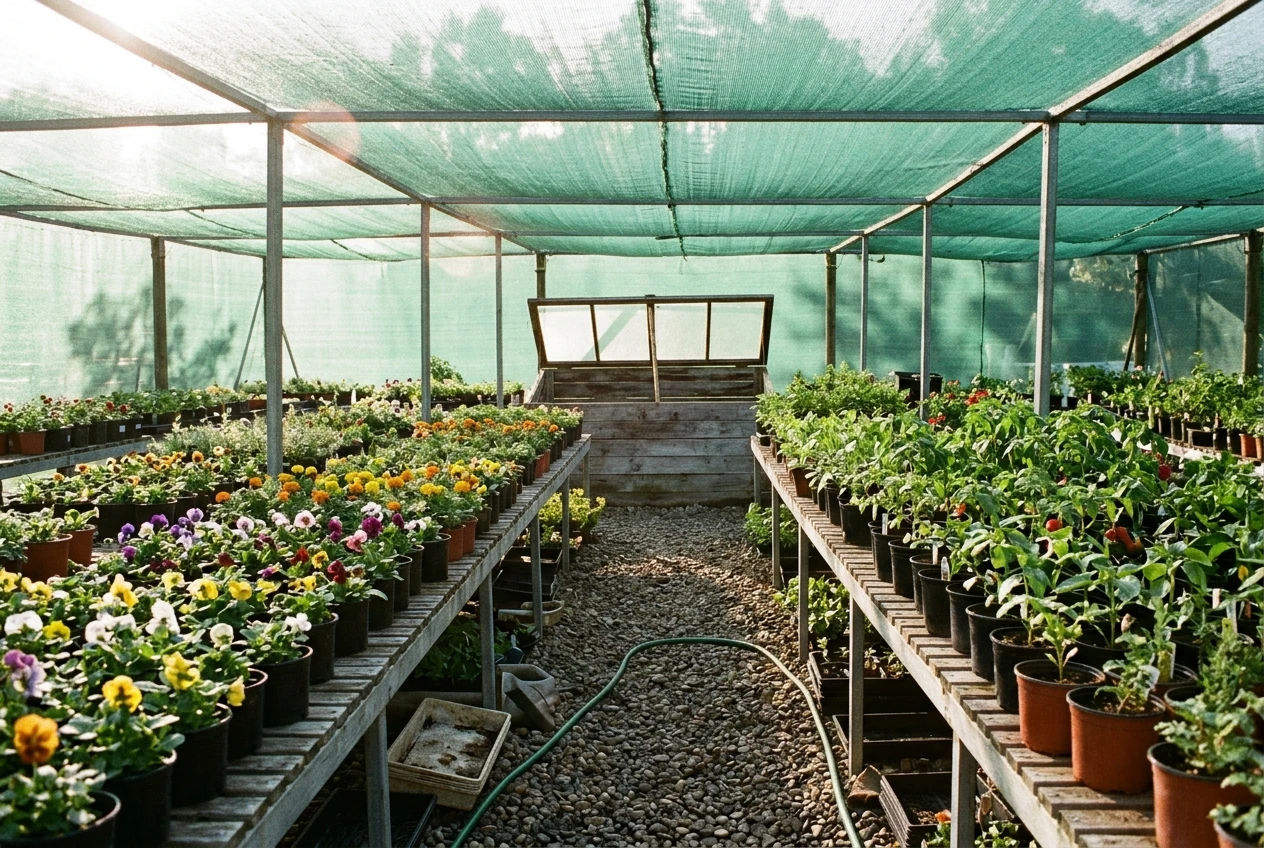
- Shade cloth. A woven shade fabric lets you step plants down from protected to full light and protects young plants from midsummer sun. Choose the density by crop: shade-loving flowers need more, vegetable transplants far less.
- Fans for air movement. In an enclosed greenhouse, steady air movement dries leaf surfaces and strengthens stems. It reduces the humidity that fungal disease needs.
Build or improvise: Benches from treated timber, metal pipe or concrete blocks with mesh tops are cheap and easy to adjust.
A simple cold frame with a hinged lid is an old and effective hardening-off tool, and ground cover fabric under outdoor holding areas keeps weeds and puddles down.
Wait: Rolling benches, automated shade systems and overhead gantries are useful in a larger production area. At small scale, they cost more than the labour they save.
How long they last: Shade cloth fades and weakens in UV light, so replace it when it tears easily or the weave frays.
Wooden benches rot where they touch damp ground, so check the legs each year.
Metal frames last far longer than wood but should be checked for rust where coatings have worn.
Fan motors last many seasons if kept free of dust and moisture.
If the propagation area is inside a structure, the frame and glazing set the temperature range and airflow you can achieve, which is covered in the greenhouse frame and glazing guide.
Potting, Media Handling and Labelling Tools That Save Labor
Potting is where time disappears. The equipment here is mostly about reducing bending, carrying and repeated motions.
Buy first:
- A potting bench at a comfortable height, with a lip or tray to catch spilled media. A good bench pays back in a day of potting.
- Scoops, a tray filler or simple tamping tools. Fill trays with a consistent amount of media so that each cell or pot is the same.
- Pots in sizes matched to your plants. Buying fewer sizes reduces the number of different media volumes, saucers and trays you need.
- Labels and markers that last. A label that fades before the plant sells is useless. Use UV-stable plastic tags with a marker rated for outdoor use, or a pencil on plastic tags, which stays legible in wet conditions. Label at the moment of sowing or potting, not later.
Rent or build: A concrete mixer or a media mixing machine is worth renting when you blend potting mix in volume. Mixing on a clean tarp or in a wheelbarrow works for small batches.
Dampen the mix before filling pots, because dry peat and coir repel water and shrink in the pot after the first watering.
Wait: Pot-filling machines, transplanters and label printers belong to the stage where you are potting thousands of units a week.
Until then, they sit idle for most of the year.
How long they last: Scoops, dibbers and hand tools last as long as they are rinsed and dried after use.
Pots last several seasons if cleaned and stored out of the sun. Marker pens run dry quickly, so buy them in packs.
A bench of treated timber lasts years but check the surface for rot or splinters.
Water and Feed Delivery for Young Plants
Young plants have small root systems, so they dry out fast and are easily damaged by heavy water.
Overwatering is as common as underwatering, because it suffocates roots and encourages disease.
Buy first:
- A soft-spray watering wand or breaker nozzle. It delivers water without washing media out of cells or knocking over seedlings. This is the most useful low-cost watering tool in the nursery.
- A basic EC and pH meter. Fertiliser strength and water pH affect nutrient uptake, and a meter lets you measure instead of guessing. Calibrate it according to the maker’s instructions and replace the probe or solution when readings drift.
- A water filter if your water is hard or dirty. Particles and minerals block nozzles and emitters.
Build or improvise: Bottom watering, where trays sit in a shallow tray of water and draw it up through the drainage holes, keeps foliage dry and avoids disturbing small seedlings.
A capillary mat bench is a simple way to automate it.
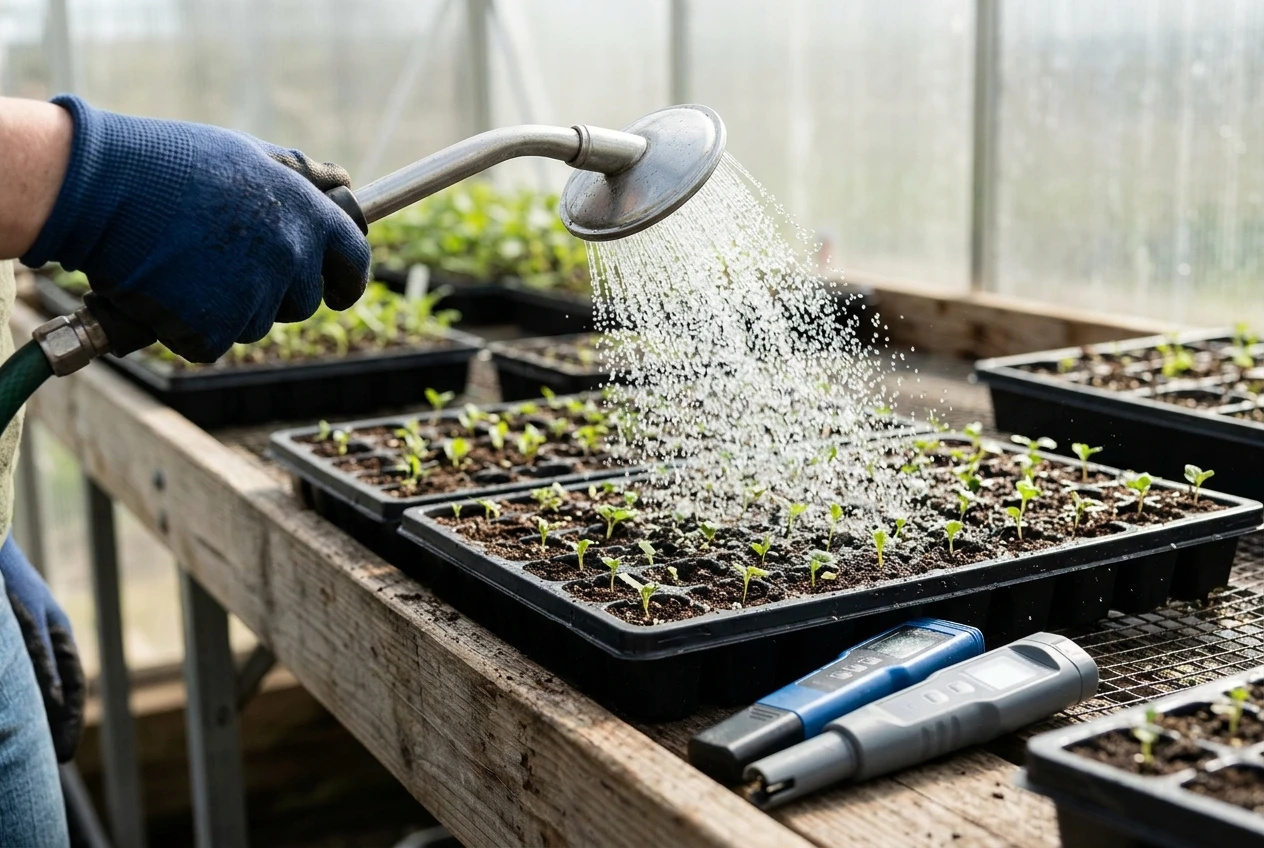
Wait: Fertiliser injectors, also called proportioners, and automated overhead or drip systems earn their cost when you are feeding many benches and cannot water by hand in the time available.
Compare a few systems and plan for expansion. Commercial irrigation system selection covers how to choose equipment that wastes less water across a larger production area.
How long they last: Hoses and nozzles wear out and leak; replace them when they crack or the spray pattern fails.
Injectors have seals and diaphragms that need replacing on a schedule set by the manufacturer. Check emitters and filters regularly, since a single blocked line can dry out a whole bench before you notice.
Cleaning and Sterilising Gear to Stop Disease Spreading
Warm, humid propagation areas favour fungal and bacterial disease, and a contaminated tray or knife can carry a problem from one batch to the next.
Cleaning is a routine, with little equipment to buy.
Buy first:
- A sanitiser suited to horticultural use. Options include bleach-based and peroxide-based products. Read the label for dilution and contact time, because using too little or rinsing off too soon leaves the disease in place.
- Brushes and wash tubs. Remove all soil and plant debris from trays, pots and tools before sanitising, as organic matter reduces the effect of most sanitisers.
- A dedicated set of cutting tools. Wipe or dip blades between plants or batches, especially when you handle anything that shows symptoms.
- Gloves and a footbath or boot wash at the propagation area entrance if you work with several growing areas.
Wait: A steam sterilising unit or a dedicated media pasteuriser becomes sensible when you recycle large volumes of containers or media.
At small scale, buying new media and washing containers by hand is more practical.
How long they last: Brushes and tubs last until they crack or the bristles wear. Blades dull with use and sanitising, so sharpen them regularly and replace any that are pitted or bent.
Sanitiser solutions lose strength once mixed, so make fresh batches as the product label advises.
Buy Now, Rent, Build or Wait: Budgeting for Replacement and Repair
Sorting purchases by timing keeps early spending on equipment that affects plant survival and labour. This table summarises where the items above usually fall.
Timing | Equipment |
|---|---|
Buy now | Cell trays and flats, seed-starting mix, heat mats with thermostat, humidity domes, soft-spray watering wand, sharp cutting tools, labels and markers, sanitiser and wash tubs, EC and pH meter |
Build or improvise | Humidity chambers, germination shelves, benches, cold frames, bottom-watering trays |
Rent or borrow | Concrete or media mixers, larger shredders or tillers for media preparation |
Wait until volume justifies it | Mist systems with controllers, seeders, rolling benches, injectors, pot-filling machines, steam sterilisers |
Three habits keep the equipment budget realistic.
Separate durable items from consumables. Benches, fans and frames are durable. Labels, markers, hormone, filters, nozzles, shade cloth and polythene covers are consumables that you replace every season or two.
Add them up, because they usually cost more over the years than the original purchase of the durable items.
Keep a short equipment log. Note the purchase date, the supplier and the failure date for each item.
After a couple of seasons you will know which brands of trays crack, which heat mats fail and how often nozzles clog, and you can budget on evidence instead of guesses.
Set aside replacement money each year. Put a percentage of propagation revenue into a repair and replacement fund, and test heat mats, timers, fans and pumps before each busy season, not in the middle of it.
Keep a few spare parts such as nozzles, thermostat controllers and diaphragms, because a failed part during germination or rooting can cost a full batch.
Before ordering anything on this list, compare trays, heat mats, shade cloth, filters and irrigation fittings across nursery and propagation equipment suppliers and price each item against its expected life, not only the cost on the day.
Then see the greenhouse frame and glazing guide for the structure that houses all of this equipment.