
Most pest problems in a vegetable garden are visible weeks before the damage is.
The aphids that crowd a cabbage in June arrived because the plant was soft and over-fed. The slugs that shred lettuce were already living under the boards at the end of the bed.
The flea beetles that peppered the arugula found it because it was the only brassica in the garden that month.
Learning how to prevent pests in a vegetable garden naturally means working in the order the season runs: soil, plant choice, timing, barriers, habitat, watering, scouting, and only then sprays.
This plan follows that order, with notes for a home bed and for a larger commercial plot at each layer.
Why prevention beats spraying: how pest problems start
A pest outbreak needs three things: a susceptible plant, a pest that finds it, and conditions that let the pest multiply.
Spraying acts only on the second and third, after the damage has begun. Prevention removes or weakens all three before the pest arrives.
Insects find crops by smell, color and by landing on something edible.
A crop that is stressed, overfed with nitrogen, or planted in a large single block is easier to find and easier to colonize.
Pests also build up faster when their natural enemies are missing, and broad-spectrum sprays remove those enemies along with the pest.
The population that returns first is usually the pest, because it breeds faster than the predators that eat it.
This is why a layered approach works better than any single remedy.
Each layer lowers the odds a little, and together they keep pest numbers below the point where they cost you harvest.
A few chewed leaves are not a problem.
A garden with no pests at all would also have no ladybugs, lacewings or parasitic wasps, which is a poor trade.
Start with the soil and the plant
Build healthy growth
Plants with steady, moderate growth resist insects better than plants pushed into soft, fast growth.
Aphids in particular concentrate on tender new tissue, which is what heavy nitrogen feeding produces.
Good soil is biologically active, drains well and holds moisture evenly. Compost worked into the bed each season is the most reliable way to get there.
At home, top-dress beds with compost before planting and mulch afterward to hold moisture and moderate soil temperature.
If you are setting up new beds, building a raised vegetable bed and keeping it productive covers the soil mix and the yearly upkeep that supports this.
On a commercial plot, a soil test before each season tells you what the crop needs, so you avoid guessing and over-applying.
Cover crops in the off-season add organic matter and keep the soil covered, which reduces weeds that shelter pests.
Choose resistant and well-adapted varieties
Seed catalogs and nursery tags list disease and pest tolerance for many vegetables.
Look for the codes and descriptions for the problems common in your area, such as fusarium wilt in tomatoes or powdery mildew in squash.
A variety bred for your region will also handle your weather with less stress, and a stressed plant attracts pests.
Buy transplants from a nursery that inspects its stock, and check the undersides of leaves and the root ball before you plant.
Bringing home a tray with whitefly or aphids puts the pest in the garden on day one. Seed suppliers and nurseries can tell you which varieties suit your climate, so ask them before you order.
Rotate crops
Many soil-dwelling pests and diseases specialize in one plant family.
If the same family grows in the same spot every year, the population of its pests builds up in the soil.
Moving crops to a different bed each season breaks that cycle.
Group crops by family, not by how they look:
- Brassicas: cabbage, broccoli, kale, radish, turnip
- Nightshades: tomato, pepper, eggplant, potato
- Cucurbits: squash, cucumber, melon, pumpkin
- Alliums: onion, garlic, leek
- Legumes: peas and beans
- Umbellifers: carrot, parsnip, celery, parsley
A rotation of at least three years before a family returns to the same bed is a common guideline, and longer helps with persistent soil diseases.
In a small garden, divide it into four sections and move each family one section along every year.
On a commercial plot, keep a field map and a written record of what grew where, since memory fails across several seasons and many blocks.
Time your planting so the crop is out of step with the pest
Most pests have a seasonal calendar.
Adults emerge, lay eggs and feed in a particular window.
If your crop is young and vulnerable during that window, it takes the full hit. If it is mature, or not yet planted, the pest finds little to eat.
Practical ways to use timing:
- Plant early or late for the pest. Flea beetles attack brassica seedlings hardest in spring. Planting a little later, or starting transplants indoors so they are already large when set out, reduces the damage a young plant suffers.
- Use transplants instead of direct seeding for crops whose seedlings are the target. A transplant has a head start and tolerates some feeding.
- Harvest and clear promptly. Leaving finished crops in the ground lets pests complete another generation on them. Pull spent plants and compost them or remove them.
- Avoid planting the same crop in staggered succession next to older plantings of that crop. Pests move from the old planting straight to the new seedlings.
The pest windows differ by region and by pest, so the most useful local source is your regional extension service or an experienced grower nearby.
Note the dates when you first see each pest this year and write them down. Next season that record tells you when to have the barrier in place.
At commercial scale, timing is also about field layout. Plant new blocks upwind and away from the oldest plantings, and break up large single-crop blocks with strips of a different crop or flowers.
Physical barriers that work
A barrier stops the pest from reaching the plant, and it works without any product at all.
It is the most dependable layer for many problems, but it only works if it is in place before the pest arrives and sealed at the edges.
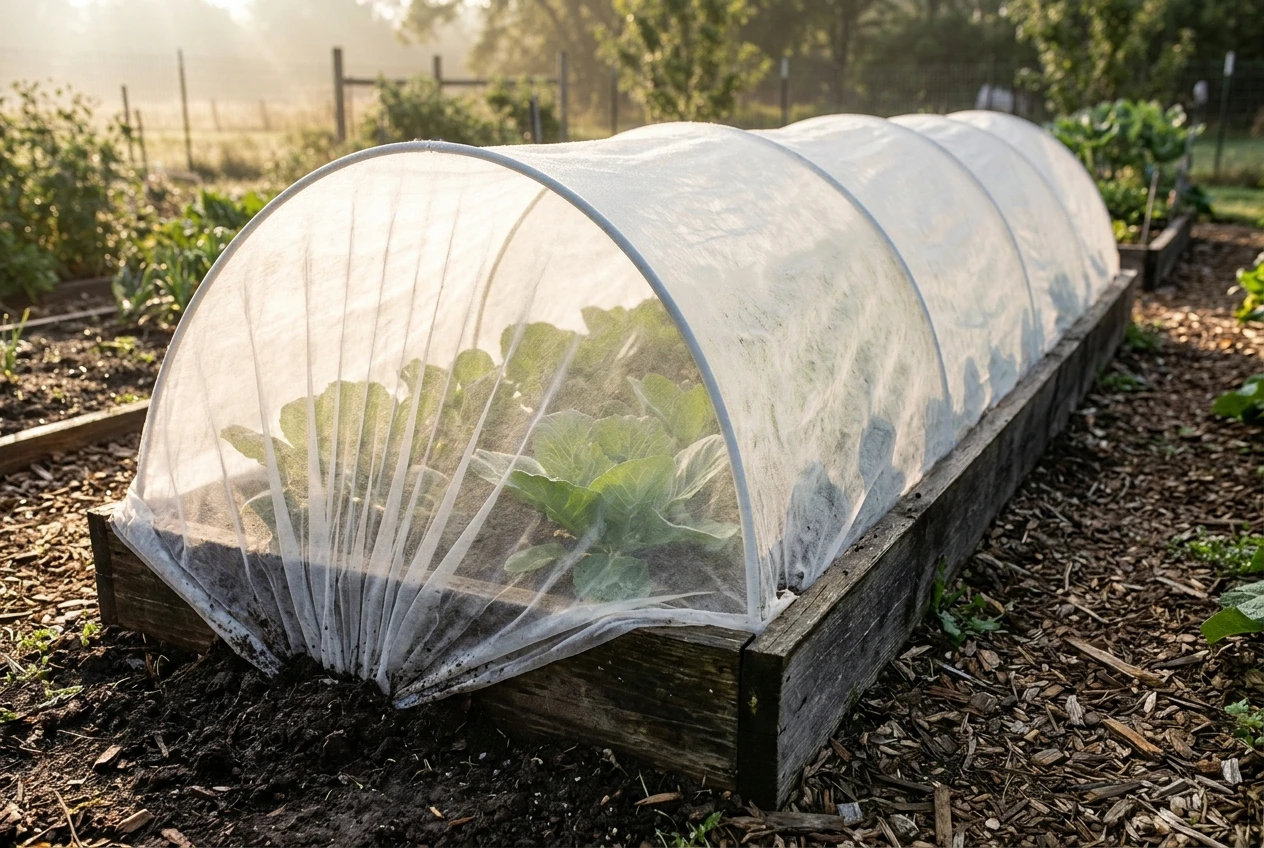
Row covers and insect netting
Floating row cover is a lightweight fabric laid over the crop on hoops or directly on it.
Insect netting is a finer mesh that blocks smaller pests while letting more air and water through.
Both exclude flying adults such as cabbage white butterflies, cabbage root flies, carrot rust flies and flea beetles.
Cover the crop right after planting and bury or weigh down every edge, since a gap lets the adults in and then traps them with the crop.
Remove the cover or open the sides for crops that need pollination, such as squash, cucumbers and tomatoes, once flowers appear.
Also check the bed was not already infested by overwintering pests in the soil before covering, which is another reason rotation matters.
Collars, cloches and traps
- Cutworm collars: a ring of cardboard or a cut plastic cup pushed into the soil around a transplant stem stops cutworms chewing through it at ground level.
- Cloches: a cut-off clear bottle or small cover over a single seedling protects it from slugs and birds in its first weeks.
- Sticky traps: yellow cards catch whitefly, fungus gnats and some aphids. Use them as monitors, to tell you what is flying and when, more than as a control.
- Slug traps and boards: a shallow container sunk to ground level and filled with beer, or a board laid on the soil, lets you collect slugs in the morning.
Home bed versus larger plots
In a home bed, hoops and fabric cover a whole bed cheaply, and you can reach in to weed and harvest.
Hand-placed collars and cloches are practical when you plant a few dozen seedlings.
On a commercial plot, covering whole fields by hand is slow.
Growers typically use cover on high-value or highly vulnerable crops and on early plantings, with mechanical support for laying and anchoring it.
Netting on tunnels and greenhouse vents is a standard approach.
Traps are used for monitoring across blocks, at a set density, so one count represents a whole area.
Bring in the pest controllers
Beneficial insects work for you all season if they have food and shelter.
Adult hoverflies, lacewings and parasitic wasps feed on nectar and pollen, while their larvae eat aphids and other pests.
If there are no flowers, the adults leave.
Plant a steady supply of small-flowered plants in and around the vegetable beds:
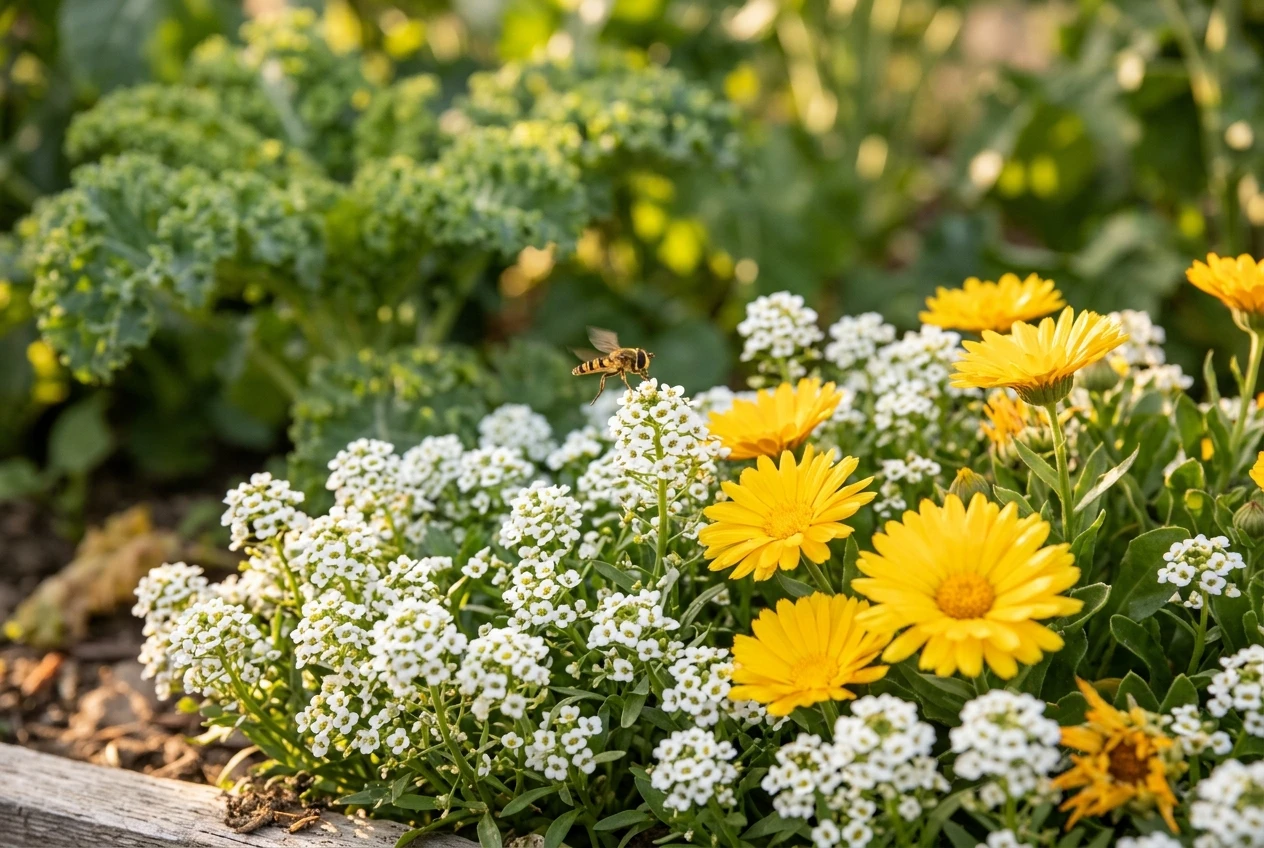
- Sweet alyssum and calendula
- Dill, fennel, cilantro and parsley left to flower
- Yarrow and phacelia
- Marigolds and zinnias
Small, open flowers with shallow nectar suit the tiny wasps and flies best. Aim for something in bloom from spring until frost.
Habitat matters too.
Leave a patch of undisturbed ground or a pile of leaves and stems for overwintering beetles and other predators.
A shallow dish of water with stones lets insects drink without drowning.
Avoid broad-spectrum insecticides, including some labeled organic, in these areas, since they kill the predators along with the pests.
At home, a flower border along the bed edge or a few pots between rows is enough.
On a commercial plot, sow flower strips along field margins or between blocks, or leave a beetle bank, a raised grassy strip, as permanent shelter.
Check any strip planting against your buyer or certification requirements before you put it in.
Purchased beneficials such as ladybugs and lacewing larvae can help in enclosed spaces like greenhouses.
In open beds, many released adults fly away, so improving habitat usually does more.
Water and feeding mistakes that invite pests
Water and fertilizer cause many pest problems that look like bad luck.
- Aphids build up on plants with a surplus of nitrogen, which produces soft, sappy growth. Feed to the crop’s needs and stop pushing growth.
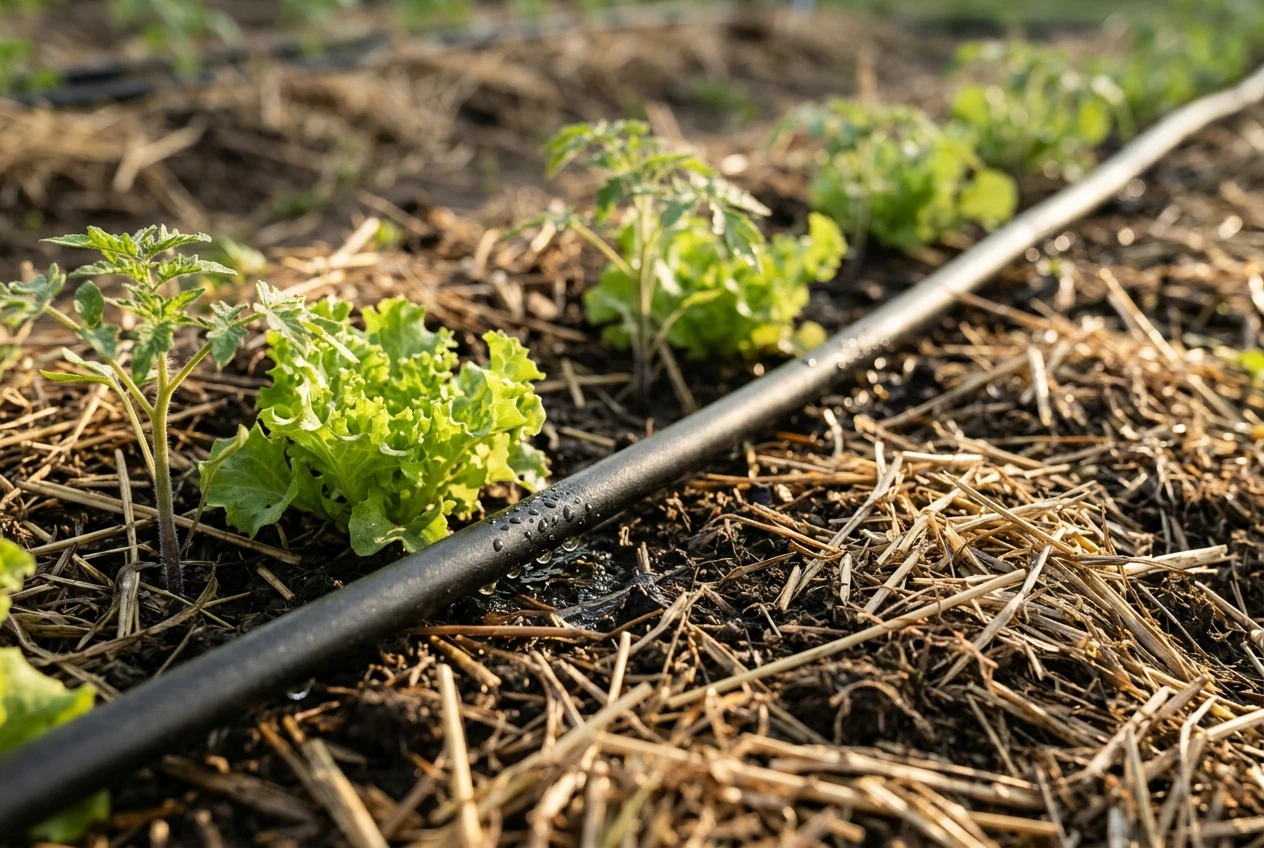
- Slugs and snails thrive where the soil surface stays wet into the evening. Water in the morning, and keep water at the roots, not over the leaves and the soil between plants.
- Fungus gnats breed in constantly wet potting mix, which matters for seedling trays and containers. Let the surface dry between waterings.
- Fungal diseases spread on wet foliage. Overhead watering and crowded plants hold moisture on the leaves, so give plants room and water the soil.
Drip irrigation and soaker hoses put water at the root zone and keep leaves dry, which cuts down on slugs and leaf disease and wastes less water.
If you are choosing between systems, this guide to drip, soaker hose and sprinkler irrigation walks through the options and setup.
Feeding works the same way. Leafy crops, fruiting crops and heavy feeders need different amounts and balances of nutrients, and giving a light feeder a heavy feeder’s ration invites soft growth and aphids.
Matching organic fertilizer to heavy feeding, leafy and fruiting vegetables explains how to pair the feed with the crop.
Scouting weekly: spot early damage and tell pests from harmless insects
A weekly walk through the beds catches problems when a few leaves are affected rather than a whole crop.
Pick one day, take a few minutes per bed, and look in the same places each time.
What to check:
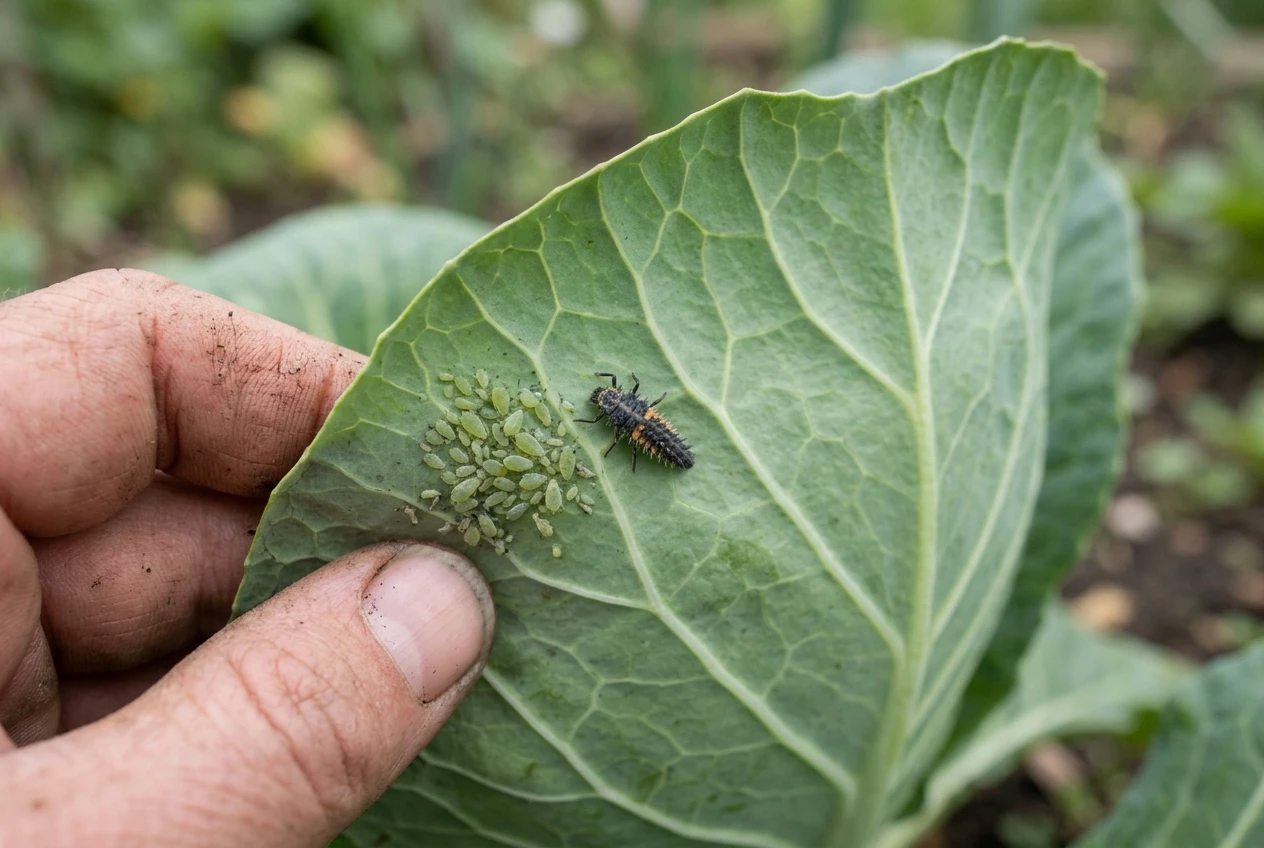
- The undersides of leaves, where aphids, whitefly and many eggs sit
- New growth tips, where aphids concentrate
- The base of stems for cutworm damage or wilting
- Soil surface and under boards for slugs
- Sticky traps, noting what and how many were caught
Learn to tell pests from helpful insects before reaching for any control.
Ladybug larvae look like small spiky dark alligators and eat many aphids. Hoverfly larvae are pale, slug-like and also eat aphids.
Lacewing larvae have pincers and hunt small insects. Spiders, ground beetles and predatory wasps are all on your side.
A bee or butterfly visiting a flower is not damaging the crop.
Keep a short log: date, crop, what you saw, how many, and what you did. After a season, it shows which pests turn up when.
At commercial scale, scouting follows a set pattern across blocks, with counts recorded against a threshold agreed in advance.
That keeps the decision to act based on numbers rather than alarm.
When prevention fails: the gentlest effective responses
Even a well-run plan sometimes fails. Respond in order, using the mildest option that does the job, and check again after a few days before escalating.
- Remove by hand. Pick off caterpillars, beetles and slugs, and drop them in soapy water. Prune and bin heavily infested leaves or shoots.
- Wash off. A firm jet of water knocks aphids and spider mites off plants. Do it in the morning so leaves dry by evening.
- Trap and barrier. Add or repair covers, collars and traps where damage is concentrated.
- Insecticidal soap. It kills soft-bodied insects such as aphids and whitefly on contact and leaves little residue, but it has to touch the pest, so cover the undersides of leaves. It can harm beneficial insects that it hits, so spot-treat.
- Biological products. Bt (Bacillus thuringiensis) targets caterpillars and has little effect on most other insects. It must be eaten by the caterpillar, so apply it to the leaves they are feeding on.
- Horticultural oils and other botanical products. Use these last, because some also affect beneficial insects. Apply in the evening when bees are not foraging, and avoid spraying open flowers.
Read the label before using any product, including organic ones. It lists the crops, pests, application rates and the waiting time before harvest.
Commercial growers must also check that a product is permitted under their certification scheme and local regulations.
A season-by-season pest prevention checklist
Seasons are named for the northern hemisphere. In the southern hemisphere, shift the list by six months.
Winter
- Review last season’s pest log and rotation map, and plan where each plant family goes this year
- Order resistant varieties, row cover, netting and irrigation fittings early
- Clean and repair hoops, nets and traps
- Clear plant debris from beds, leaving a small habitat area undisturbed
Early spring
- Test the soil if you have not recently, and work in compost
- Set up or repair beds. This guide to raised vegetable beds is useful if you are building new ones
- Install drip or soaker lines before planting
- Start transplants indoors, and keep the trays from staying wet
- Sow early flowers such as alyssum and calendula
Late spring
- Set out transplants and cover susceptible crops straight away, sealing the edges
- Put out collars around transplants and slug traps in damp areas
- Hang yellow sticky traps for monitoring
- Begin weekly scouting
Summer
- Open or remove covers on crops that need pollination once they flower
- Water in the morning at the roots, and avoid overfeeding
- Keep flowers blooming for beneficial insects
- Respond to any pest in the order of escalation, starting with hand removal
- Harvest regularly and remove spent plants
Autumn
- Clear finished crops and diseased plant material, and do not compost anything with serious disease
- Plant cover crops in empty beds
- Record this season’s pests and the dates you first saw them
- Leave leaf piles and stems in one corner for overwintering predators
Start your pest-prevention kit
Most of the gear in this plan is inexpensive and reusable across seasons.
A simple starter list: floating row cover or insect netting with hoops and clips, yellow sticky traps, cutworm collars, and drip irrigation fittings with a timer.
Browse our garden equipment and irrigation supplier partners to put the list together and have it ready before the first transplants go in.