Choosing the best irrigation system for a vegetable garden comes down to four questions: how your beds are arranged, what you grow in them, how much ground you cover, and how much time you want to spend holding a hose.
Most people pick the cheapest sprinkler or a roll of soaker hose and find out a season later that it suits their beds poorly.
This guide compares the four common methods, matches them to different layouts, and then walks through one drip setup in the order you would build it.
Why the way you deliver water matters as much as how much you give
Two gardens can apply the same weekly volume of water and get very different results.
The difference is where the water lands and how fast it arrives.
Vegetable roots take up water from the soil, not from the leaves. Water that lands on foliage does little for the plant, and wet leaves stay wet long enough for fungal diseases such as early blight on tomatoes or powdery and downy mildews on squash and cucumbers to take hold.
Water applied faster than the soil can absorb it runs off or pools.
Water applied in a shallow splash every day keeps roots near the surface, where they dry out first in hot weather.
A good delivery method puts water at the base of the plant, slowly enough for the soil to take it in, and repeats that reliably.
Reliability matters more than most people expect.
Uneven moisture causes split tomatoes, blossom end rot, bitter cucumbers and bolting lettuce, and a system that waters on a schedule removes much of that swing.
A common rule of thumb is about 1 inch of water per week for vegetables, counting rain and irrigation together.
Treat that as a starting point.
Sandy soil, hot wind and fruiting crops in midsummer all push the need higher, and cool weather and heavy soil lower it.
Hand watering, sprinklers, soaker hoses and drip compared side by side
Each method has a job it does well and a layout where it fails.
Hand watering with a hose, wand or can gives you full control. You see each plant, you notice wilting or pests, and you can give a thirsty plant extra.
It is the right choice for seedlings, newly transplanted crops and a few containers. It fails when the garden grows, because the job takes daily time, and it fails when you are away.
People also tend to water lightly and quickly, which wets only the top of the soil.
Overhead sprinklers cover a large area for little money and are easy to set up. They are also the least efficient option for vegetables.
Wind carries spray off target, a good share evaporates before reaching the soil, and wet foliage encourages disease.
Sprinklers do have a place: they wet the soil surface evenly, which helps direct-sown seeds such as carrots and lettuce germinate, and they suit closely sown crops and cover crops across wide plots.
Water them in the morning so leaves dry quickly.
Soaker hoses are porous hoses that weep water along their length. They are cheap, simple, and keep water off leaves.
Their limits are consistency and lifespan. Water pressure drops along the hose, so the far end gets less than the start, and they work best on level ground and short runs.
Output varies with the hose’s age and with mineral buildup from hard water, and you cannot easily see which section is under-delivering.
They suit a few straight rows or one or two beds.
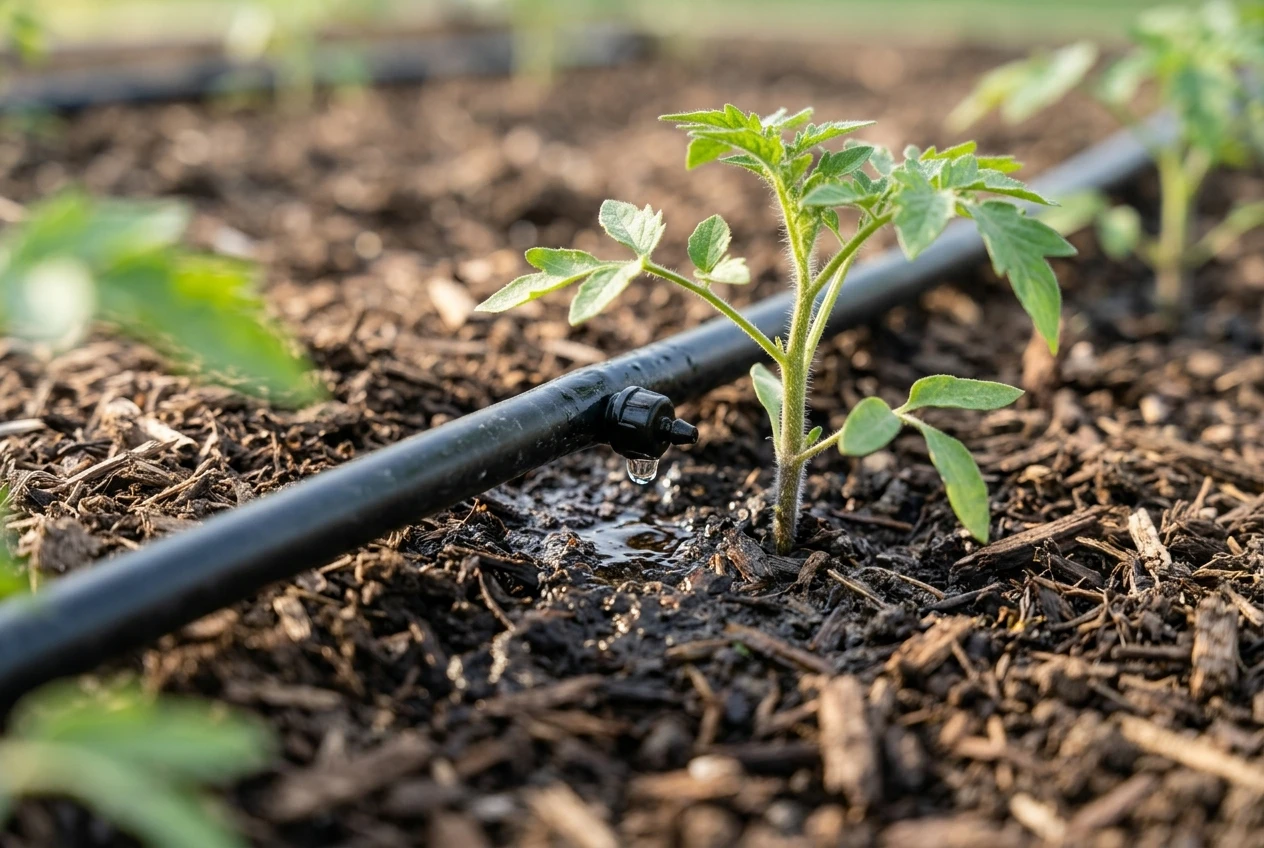
Drip irrigation uses tubing with emitters that release water in measured amounts, at a known rate per hour, at each plant or along the row.
It wets the root zone with almost no waste, keeps foliage dry, and runs well on a timer.
It costs more to set up, needs a filter and pressure regulator, and has to be checked for clogs.
For most vegetable growers it is the best long-term answer, and the set-up later in this guide is built around it.
Method | Best for | Main weakness |
|---|---|---|
Hand watering | Seedlings, containers, small plots | Time, inconsistent depth |
Overhead sprinkler | Germinating seed, wide plots, cover crops | Evaporation, wet leaves, wind drift |
Soaker hose | A few short, level beds | Uneven output, hard to monitor |
Drip | Rows, raised beds, mixed crops, any scale | Setup cost, filtering and maintenance |
Matching the method to your layout: rows, raised beds, containers and larger plots
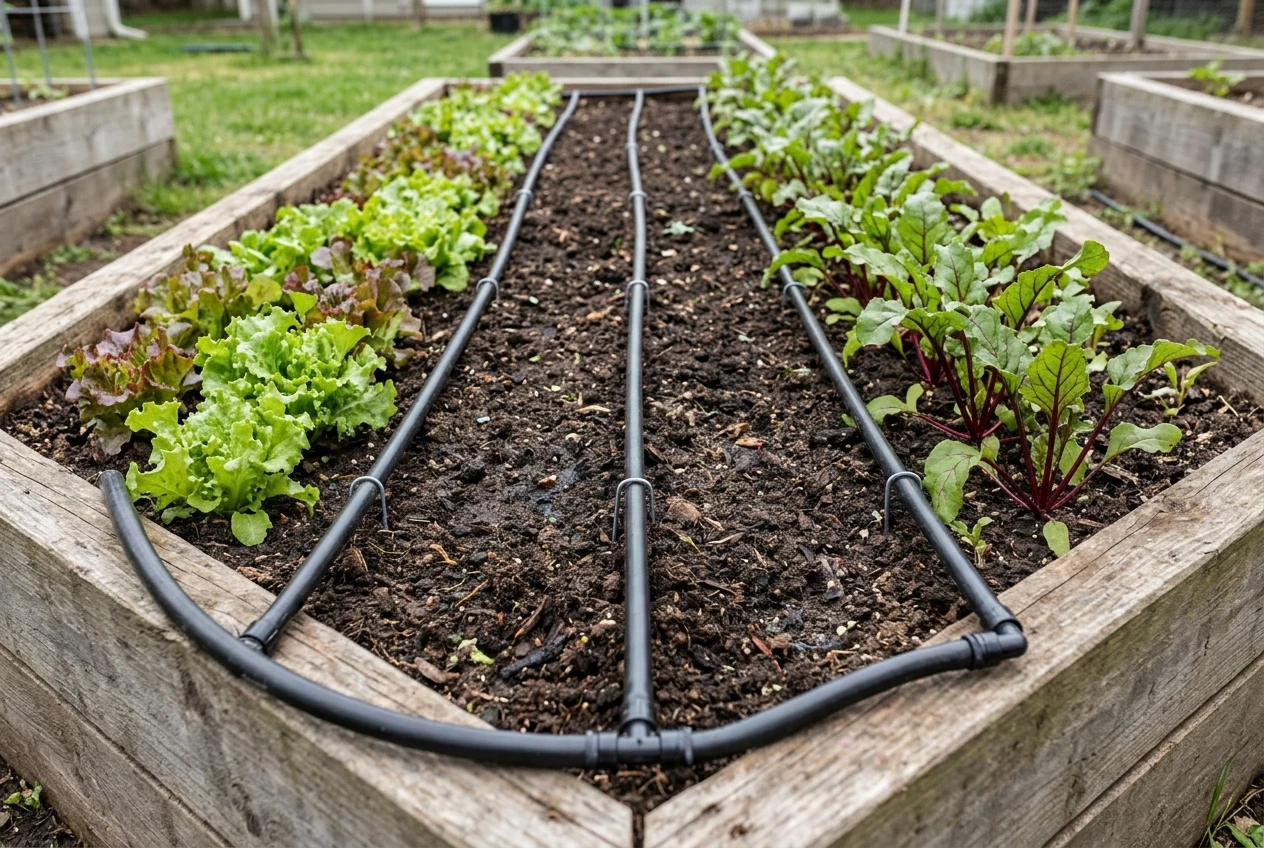
Raised beds. Beds are small, regularly shaped and often built with wide planting areas, which suits drip.
Two to four lines of drip tubing run along the length of a four-foot-wide bed, or a grid of lines for intensively planted squares.
If you are still deciding on bed size and materials, how to build a raised vegetable bed covers that side.
Raised beds drain quickly and dry out faster than ground soil, so they benefit from frequent, short drip runs.
In-ground rows. Long single rows of tomatoes, peppers, beans or brassicas suit drip tape or inline emitter tubing laid straight along each row.
Soaker hose can work if the rows are short and level.
For long rows on a slope, choose pressure-compensating emitters, which release the same amount of water whether they sit uphill or downhill.
Containers. Pots dry out quickly, sometimes daily in summer.
Use individual drippers on small-diameter tubing, one or two per pot, fed from a mainline.
Hand watering works for a handful of pots, but a drip setup with a timer removes the daily chore and the risk of a missed day.
Larger plots and small commercial blocks. Once you have dozens of rows, water supply becomes the limit.
A tap or well pump delivers only so many gallons per hour, and every emitter draws from that total. Divide the block into zones, each small enough for your source to run at the same time, and water the zones one after another with a controller that opens a valve for each.
Commercial growers typically use thin-walled drip tape under plastic mulch, a pump with sand or screen filtration, and header pipes feeding each row.
The principles are identical to a home setup, with larger pipe and filters.
Mixed crops. Plants with different water needs, such as thirsty squash beside drought-tolerant herbs, are easier to manage if each type has its own zone or its own emitter size.
Group crops by water demand when you plan beds and the irrigation follows naturally.
What a basic drip setup needs: tap or pump, filter, pressure regulator, mainline, tubing and emitters
A drip system is a short chain of parts, connected in a fixed order from the water source to the plant.
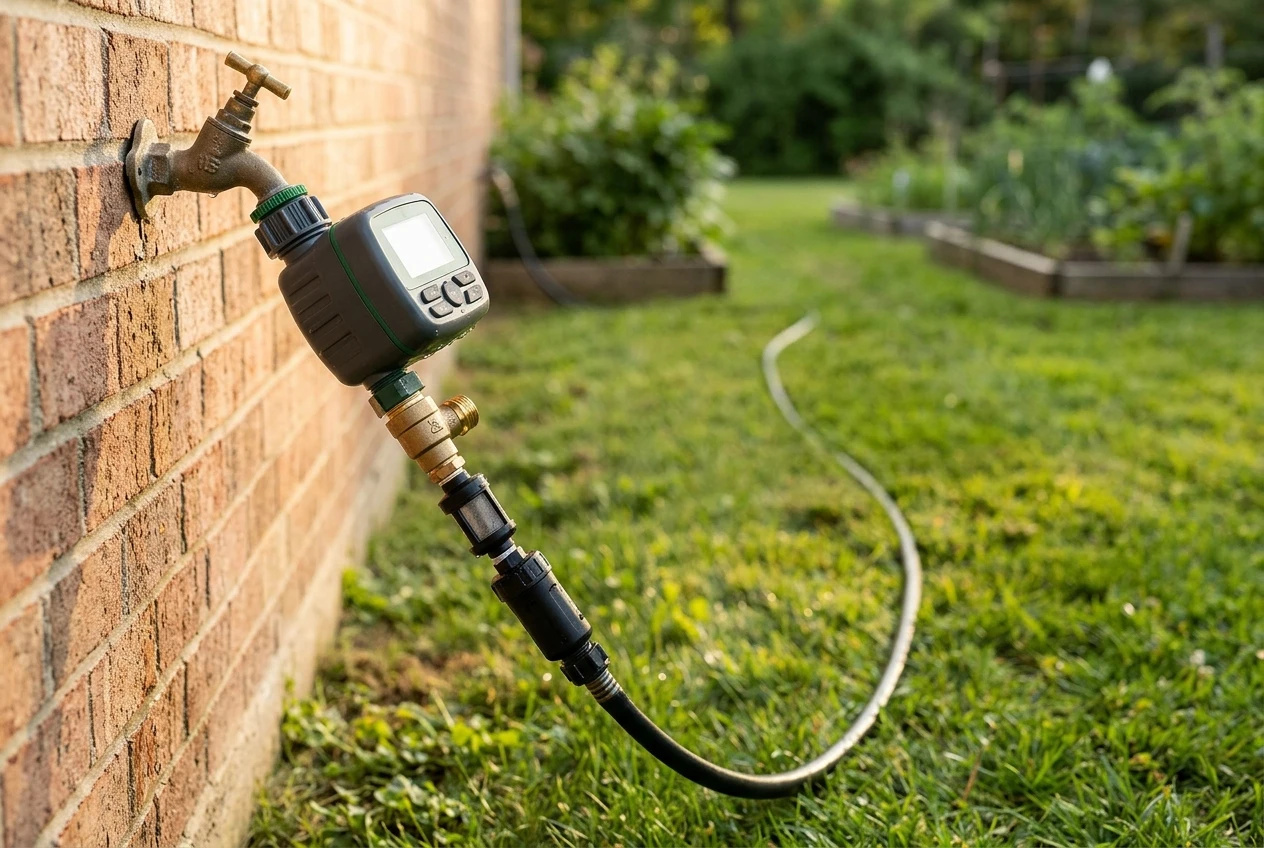
- Water source. An outdoor tap for a home garden, or a pump, tank or well for larger plots. Fit a backflow preventer at the tap so garden water cannot siphon back into the house supply. Many areas require one.
- Filter. Emitter openings are tiny, and grit or algae will block them. A screen filter in the range of 150 to 200 mesh is standard for drip. Water from wells, ponds or tanks carries more debris and may need a larger or disc filter.
- Pressure regulator. Household water pressure is often well above what drip components are built for, and most drip tubing and fittings are designed to run at roughly 10 to 30 psi. A regulator at about 25 psi, or the figure printed on your tubing, prevents blown fittings and popped emitters.
- Mainline. Half-inch polyethylene tubing carries water from the tap to the beds. It is flexible, UV-resistant and cuts with a sharp pair of pruners or a tubing cutter.
- Distribution tubing. Smaller quarter-inch tubing branches off the mainline to individual plants or containers, or you run inline drip tubing with emitters already built in, spaced at 6, 12 or 18 inches.
- Emitters. Rated by flow, commonly 0.5, 1 or 2 gallons per hour. Choose spacing and flow to match your soil and plant spacing.
- Fittings and ends. Connectors, tees, elbows, hole punch, stakes to hold the tubing down, and an end cap or flush valve for each line.
Test your supply before you buy.
Time how long the tap takes to fill a 5-gallon bucket and work out gallons per hour.
Add up the flow of every emitter you plan to run at once. If the emitters demand more than the tap delivers, split the garden into zones.
Laying it out step by step, from sketching the beds to flushing the lines
- Sketch the garden. Draw each bed or row to scale, mark the tap, and note where each crop goes. Measure the distance from the tap to the farthest bed so you can buy enough mainline.
- Check flow and plan zones. Use your bucket test. Group beds into zones whose total emitter flow stays under what the tap provides, and keep crops with similar needs together.
- Assemble the head assembly at the tap. Connect in this order: tap, timer (if you are using one), backflow preventer, filter, pressure regulator, then an adapter to the half-inch mainline. This order keeps the filter protecting everything downstream, and the regulator controls pressure for all the tubing.
- Lay the mainline. Run half-inch tubing along the edge of the beds and let it sit in the sun for a while first, because warm tubing is more pliable and easier to straighten. Stake it down every few feet.
- Connect the beds. Punch a hole in the mainline or use a fitting at each branch point. Attach drip line, such as inline emitter tubing, along each row or bed, or run quarter-inch tubing to individual plants.
- Position the emitters. Place them at the base of each plant, or space inline emitters so their wetted circles overlap along the row. On sandy soil, water moves down more than sideways, so close spacing helps. In clay soil it spreads sideways, so wider spacing works.
- Close the ends. Fit an end cap or flush valve at the end of each line.
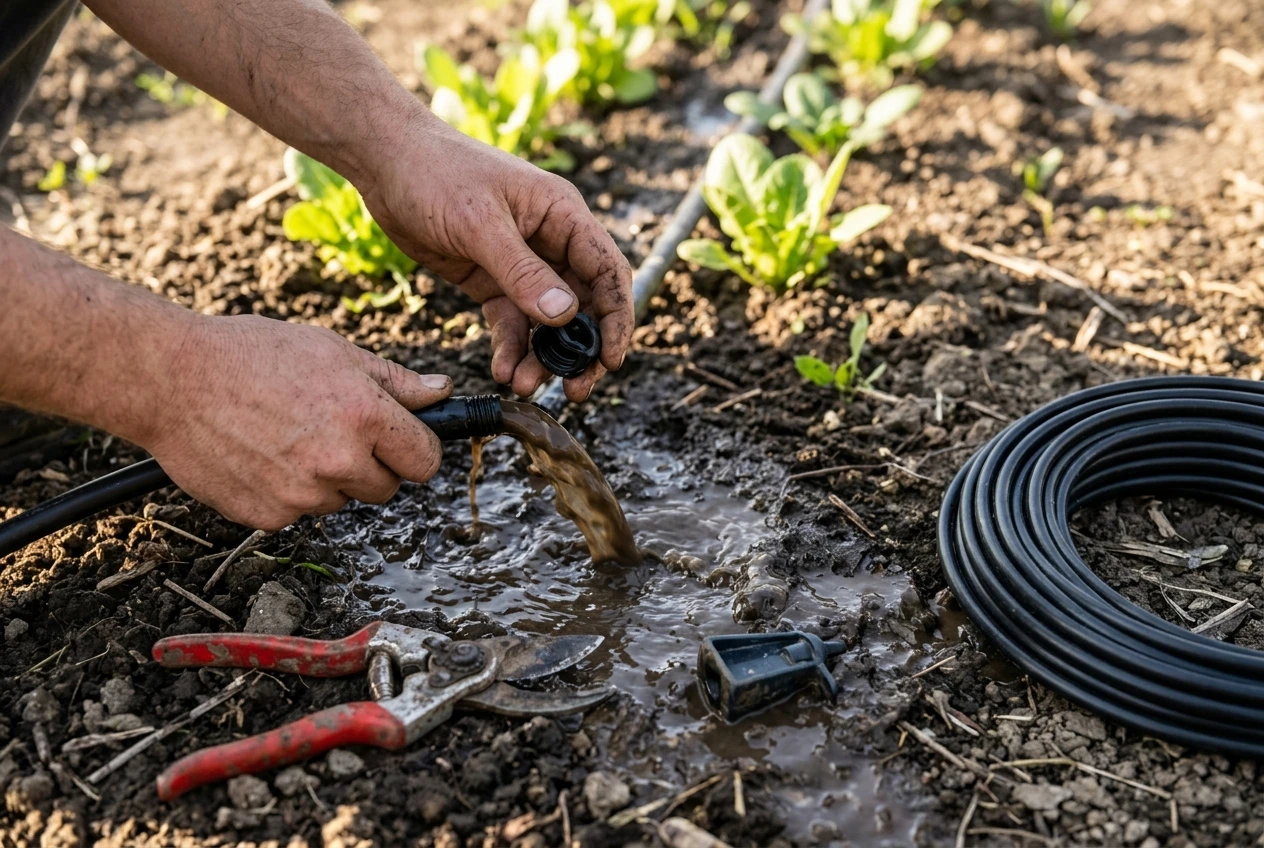
- Flush the lines before use. Open the end caps and let water run for a minute or two to push out dirt and plastic shavings from cutting, then close them. Do this again at the start of every season.
- Run a test. Turn the water on, and walk the lines. Check for leaks at fittings, emitters that are not dripping, and spots where water pools or runs away. Dig down a few inches after a run to see how far the water has actually spread.
Install the system before planting if you can. Otherwise lay it between rows and move emitters next to each plant as it goes in.
Adding a timer and adjusting for crop stage, soil type and weather
A hose-end or tap timer is the cheapest way to make drip dependable. Simple models open the valve at set times for set durations.
Larger setups use a multi-zone controller.
Programmable timers with a rain delay or a soil moisture sensor skip a run when the ground is already wet.
Start with a baseline and adjust it from observation:
- Crop stage. Seedlings and fresh transplants need frequent, short watering because their roots are shallow. Established fruiting crops such as tomatoes, peppers and squash need deeper, steadier watering, especially once flowers and fruit begin to form.
- Soil type. Sandy soil holds little water, so give shorter runs more often. Clay holds water longer and absorbs it slowly, so give longer runs less often and watch for pooling. Compost and mulch help every soil type hold moisture.
- Weather. Heat and wind raise demand, and cool or cloudy days lower it. Check the timer after a heat wave or a stretch of rain instead of leaving it untouched all season.
- Check the soil. Push a finger or trowel 3 to 4 inches into the soil beside a plant. If it is dry at that depth, increase run time. If it is soggy, reduce it.
Direct-sown seeds such as carrots, beets and lettuce need the top inch of soil to stay damp until they sprout.
Drip alone may not wet the surface well enough, so water those rows by hand or with a sprinkler until the seedlings are up, then rely on the drip lines.
Common mistakes: clogged emitters, wrong pressure, overwatering and winter damage
Clogged emitters. The usual cause is a missing, dirty or undersized filter. Clean the filter screen regularly, flush the lines at the start of the season, and replace any emitter that stays dry after flushing.
Hard water leaves mineral scale, which a soak in diluted vinegar can often clear.
Wrong pressure. Skipping the regulator is the most common cause of tubing that pops off fittings and emitters that spray.
Too little pressure shows up as weak output at the far end of long runs. If the end of the line is dry and the near end is fine, shorten the run, use a larger mainline, or split the garden into zones.
Overwatering. More water is not safer. Saturated soil starves roots of air, encourages root rot and washes nutrients down below the root zone.
Yellowing lower leaves and soil that stays wet a day after irrigation are signs to shorten run times.
Emitters in the wrong place. Emitters pulled away from the plant by wind, animals or weeding leave roots dry.
Check placement every couple of weeks and restake loose tubing.
Letting lines go unchecked. Rodents and trimmers cut tubing, and a single broken line can drain the whole system’s flow or leave a bed dry for days. Walk the lines when the timer runs, once a week.
Winter damage. Water left in tubing, filters and regulators freezes, expands and cracks them.
Before the first hard frost, drain the system, open the end caps, and blow out the lines with compressed air if your climate is cold.
Disconnect and bring indoors the timer, filter and regulator, and store the tubing out of direct sun.
In mild climates with only occasional frosts, at least disconnect the timer and the head assembly on frost nights.
Where to buy parts and what to look for in a starter kit versus a scaled-up system
Drip components are sold by irrigation suppliers, garden centers, hardware stores and online.
Supplier shops often stock fittings in more sizes and sell tubing by the foot, which helps when your layout does not fit a kit.
Starter kits bundle a mainline, quarter-inch tubing, a set of emitters, a filter, a regulator and connectors, and they suit a few raised beds or a small row garden. When comparing them, check:
- Whether a filter and a pressure regulator are included, since some cheaper kits omit one or both.
- The tubing size and the stated working pressure.
- Whether emitters are adjustable or fixed, and what flow rates are available.
- Whether you can add to the kit later with standard fittings, so you can expand the system without replacing it.
- Whether the kit’s total length and number of emitters match your sketch.
Scaled-up systems for larger plots or commercial blocks are better built from separate parts chosen to fit your flow and acreage.
Look for larger filters (disc, screen or sand, depending on water quality), pipe of larger diameter for headers, drip tape or heavier-wall tubing for rows, multi-zone controllers with solenoid valves, and a pump sized to your flow requirement.
Talk to the supplier with your flow test and your layout sketch in hand. They can usually tell you whether your source supports the zones you planned.
Whatever the size, buy a few spare connectors, emitters and end caps with the first order.
They cost little, and a missing part should not leave a bed dry while you wait on a delivery.
Compare drip kits, timers and filters from irrigation suppliers to find a starter setup sized for your beds.